To begin with, rubber stamps usually came as wood mounted. But at some point, someone came up with the idea of offering them as unmounted. There are 3 main reasons for doing so.
First, um stamps can usually be bought for 1/2 the price of mounted. This is because it saves the seller the time, trouble & expense of having to mount them themselves. This is especially true for the smaller companies. (like me) And of course buying them at half the cost of mounted saves money & allows you/me, etc. to buy more stamps.
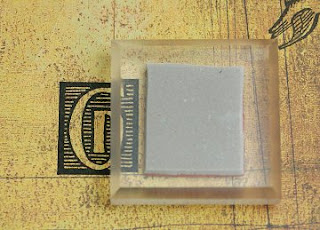
Second, using systems like EZ Mount, allows us to see where we're stamping (thru the clear acrylic mounts) so we can more accurately place our images. (a big plus)
Third, it's much easier to store lots of stamps without the added bulk of the wood mounts, as you only need a limited number of mounts because you can mount & remove the static cling mounted stamps over and over.
Them's the basics.
I'll now go into 3 ways of mounting stamps.
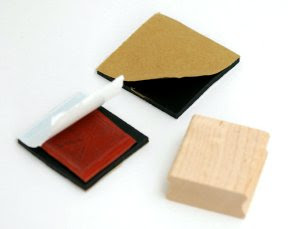
Wood mounting requires,
1. a wood mount, usually maple.
2. mounting foam, (I personally use the self stick kind, sticky on both sides)
3. a rubber stamp.

Peel off the white liner and stick the rubber stamp (image side up) to the foam. Then trim the excess foam from around the stamp. Requires a really sharp pair of scissors, or a scroll saw.
Peel off the brown liner paper and center it on the wood mount. It's best to index the wood first (indexing is stamping the image onto the wood as a reference) To do this you'll need to temporarily mount the stamp to something in order to stamp on the wood. Heh Heh, kind of a Catch-22, ya need to mount the stamp to index the stamp, ya need to mount. go figure ;-)
Pro - they look cool, ready when ya need them & they can be stacked like building blocks.
Con - they take up more space and stamping with them requires finely tuned guesswork.
EZ Mount Static Cling Mounting, needs..
EZ Mount Static Cling Mounting, needs..
1. EZ Mount static cling foam. Sticky on one side static cling on the other. Liner paper on both sides.
2. clear acrylic mounts. Don't have to be "EZ" mounts, any thick plexi will work, even glass.
3. a rubber stamp
Same instructions as before, stick stamp (image side up) to adhesive side of EZ mount foam, trim to edge of stamp.
To use, peel off liner paper covering static cling side and stick to acrylic mount, press to make sure it sticks.

Pros & Cons of Static Cling
Pros - ya can see where your stamping, takes up less storage room & ya only need a handful of mounts for many different stamps.
Cons - if you don't take really good care of your stamps, the static cling side won't work so well. It also helps to keep your acrylic mounts clean & scratch free. I haven't tried it yet but I'd guess stamps that have lost their cling could be soaked in an adhesive release to remove the foam, then
replace it with fresh static cling foam.
You might want to experiment on a stamp you no longer use to see how the rubber will react to the adhesive release. Seems like I might've read somewhere that you could put it in the microwave for a short time to get the sticky foam to let go. (I wouldn't recommend doing this if you've already soaked it in adhesive release, you might start a fire!) Haven't tried this one either.
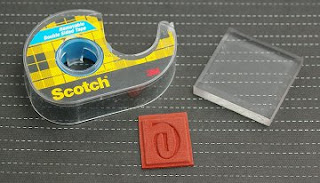
Ok, now for the quickest & easiest. You'll need an arcylic block & double stick tape. I use Scotch Removable Double Stick Tape
 All that's required is to put a piece of tape on an acrylic block, slap a stamp to it & go. The tape holds the stamp well enough to use and removes cleanly when done. This particular tape, works very well, holds the stamp yet comes off cleanly when I need to replace it. You may need to stamp on a padded surface so the image prints well, (I used this system to print the G's in the photo above, with the paper on a smooth hard surface, worked just fine)
Pros & Cons
Pros - cheap, clean & easy. This is a good option if you're new to the "um stamp world" it's inexpensive to play with.
Cons - can't really think of any. Well, except for one. If you slap the tape on too carelessly, like hanging out past the rubber, you might distort your view of where you're stamping since the tape is not optically clear like the acrylic block.
That's it, I believe this is my longest post up to date. Hope I answered any questions you might have had. If not, feel free to ask in the comment section.


No comments:
Post a Comment